Set up SAML
Step 1: Configure trust between service provider and identity provider
The connection between the identity provider and Qmatic Experience Cloud is set up by Qmatic's configuration team. But there are some things you need to do in the identity provider:
-
In the identity provider, register a new application and name it for example Qmatic.
-
Configure the new application by filling in the following fields, provided to you by Qmatic through the SAML intake form:
-
Identifier (Entity ID) – this may be called different things in different identity providers
-
Reply URLs
In Microsoft Entra ID, you find these fields in the Basic SAML Configuration section.
-
-
If you want the users' preferred language to be preselected when logging in to the Qmatic system, you need to expose preferred language as a SAML attribute in the identity provider. In Microsoft Entra ID, it is done here:
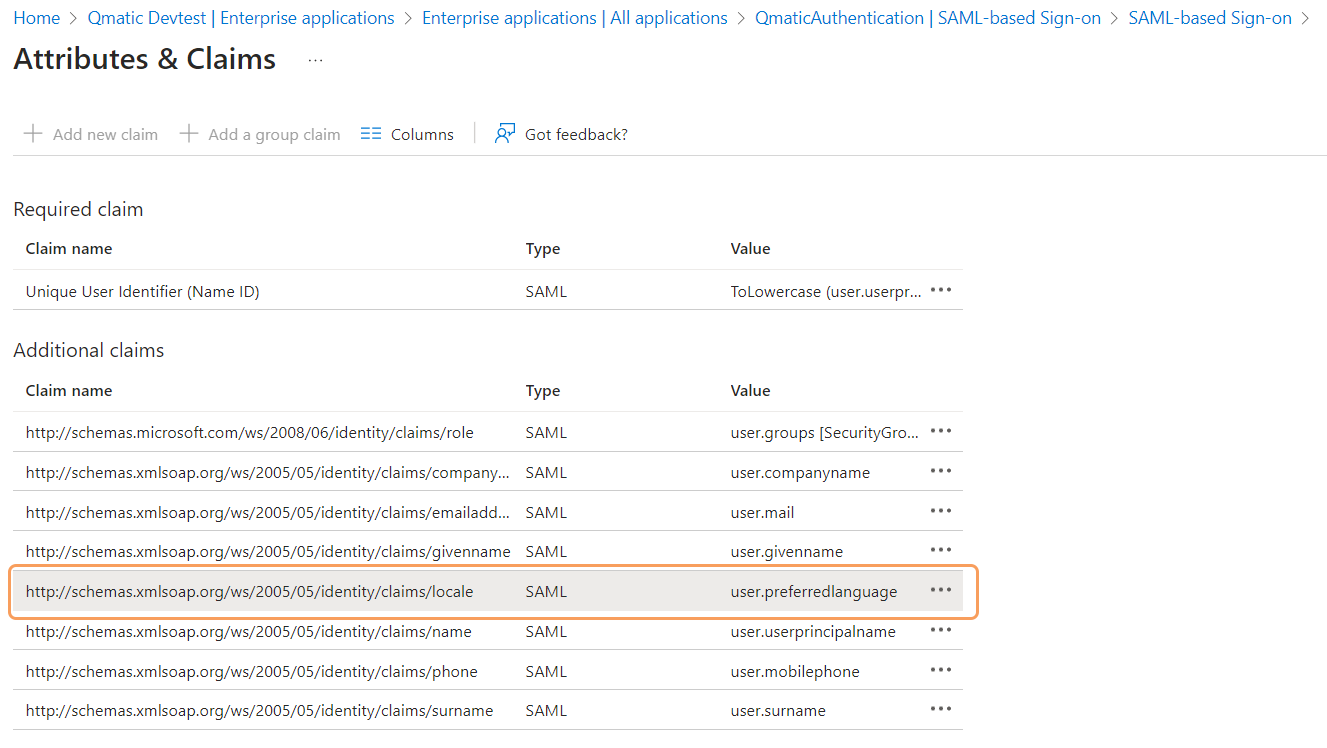
Select Add new claim and fill in the required fields.
Note that it is the language set as Display language for each user in the identity provider that will be used as preselected language in Qmatic Experience Cloud.
-
Fill in the SAML intake form with the following setup details:
-
Identity provider
-
Meta document source – Select URL or file.
-
Meta endpoint URL – If you use URL, you need to provide the Metadata URL. In Microsoft Entra ID, it is found in the SAML Certificate section.
-
-
Also in the SAML intake form, adjust the Attribute Mapping table if needed.
Step 2: Create auth groups
You can create three different kinds of auth groups in your identity provider for Qmatic Experience Cloud. Groups for roles and branch access are mandatory, while groups for service access are optional.
-
Groups for roles: Create groups for giving users read and/or write access to different parts of the system. For a list of what roles are available, see
-
Groups for branch access: Create groups for giving users access to different branches. To read more about branch permissions, see
-
Groups for service access: For getting read and write access to different services. See
To create auth groups:
-
In your identity provider, create the needed groups. To learn how to create groups in Microsoft Entra ID, see https://learn.microsoft.com/en-us/entra/fundamentals/how-to-manage-groups
-
Add the groups to the newly created Qmatic application.
Step 3: Map auth groups
Auth groups for roles, branch access and service access needs to be mapped to roles, branches and services in Qmatic Experience Cloud. The mapping is done by Qmatic's configuration team, but you need to fill in the SAML intake form with information about which groups should be mapped to which roles.