Schedule and download reports
While working with reports, you have a lot of options for what you can do with them. You can apply filters and view them directly on the screen, you can download them, and you can schedule them to be sent out by email with a certain interval.
Schedule reports
You can schedule reports so they are sent out regularly by email to chosen recipients.
-
Go to Reports, open the report type you want to schedule and apply any filter you want to use on the report.
-
Click Scheduling in the menu. All scheduled reports for the selected report type will be listed.
-
Click Add new schedule.

-
Enter the settings for your schedule:
-
Schedule name
-
Email recipient(s)
-
Format: PDF, CSV, or XLSX
-
Report filters
-
Schedule interval: time zone and time intervals for report emails
-
-
Click Save.
Edit, pause or delete report schedules
To edit, pause, or delete a schedule:
-
Open Reports and open the report type for the schedule you want to edit, pause or delete.
-
Click Scheduling in the menu.
-
Click Edit, Pause or Delete.

Download report
You can download reports as PDF, XLSX or CSV. Before you download it, you can apply any wanted filters and settings.
To download a report as PDF:
-
Go to Reports, open the report type you want to download and apply any filter you want to use on the report.
-
When the report has loaded, click Download.
-
Enter a file name and click Save.
To download a report as XLSX or CSV:
-
Go to Reports, open the report type you want to download and apply any filter you want to use on the report.
-
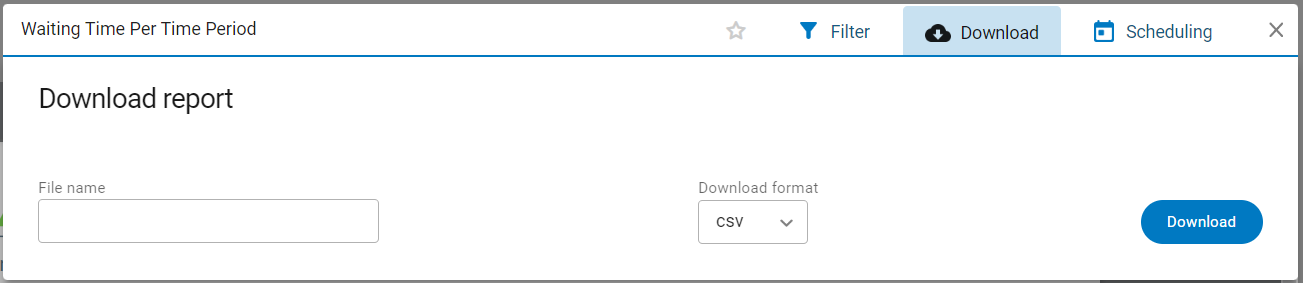
Click Download in the menu.
-
Enter a file name and select a file format.
-
Click Download. It may take some time before the report is downloaded. You will be notified if the download was successful.
Apply filters and settings to reports
Use filters to limit the data shown in the report. The available filters and settings vary depending on the report.
-
Open the wanted report type and click Filter.
-
Apply filters and setting and click Done.
The following filters exist:
| Name | Definition |
|---|---|
| View | Per Day, Per Month, Per Weekday, Per Week - Defines how the data is grouped. For example, if "Per Month" is selected, the row for January shows a sum of all data for January. If the report covers several years the report shows the sum of all included Januaries. |
| Date Selection | Yesterday, Previous week, Previous month, This year, Manual Selection - Defines which time period the report is going to include. |
| From Date, To Date | Dates - In case "Manual Selection" is selected, this setting defines what time period to include in the report. |
| Branch Name | All [Branches the user has access to] - Defines what branches to include in the report. |
| Service Name | All [Names of services available for the selected branches] - Defines what services to include in the report. |
| Service Point Name | All [Names of service points available for the selected branches] - Defines what service points to include in the report. |
| Queue Name | All [Names of queues available for the selected branches] - Defines what queues to include in the report. |
| Staff Name | All [Names of staff members available for the selected branches] - Defines what staff members to include in the report. |
| Interval (Days) | The interval length in days. |
| Interval (Min) | The interval length in minutes. |
| Period (Min) | Some reports show data grouped in different time intervals of a day. This setting defines the length of the interval. |
| Start Time, End Time | Defines the start and end time for the data included in the report. Values with a time stamp before the start time or after the end time are not included in the report. |
| Visit Id | The visit ID for which all events should be listed. |
| Customer Id | The customer ID for what data to present in the report. |
| Ticket Number | The ticket number for data to present in the report. |
| Week Type | Week Number, Week Number ISO - The standard used to display the week number in the report: U.S. standard or ISO 8601 standard. |
| Include settings page | Yes, No - Defines if the settings are going to be shown in the report or not. |
| Mark Type | All [Names of all available mark types] - Defines what mark types are going to be included in the report. |
| Mark Name | All [Marks within the selected mark type] - Defines what marks to include in the report. |
| Numeric Question | All [Configured numeric questions] - Defines what questions to include in the report. |
| Text Question | All [Configured text questions] - Defines what questions to include in the report. |
| Answers | All [Configured answers] - Defines what answers to include in the report. |
| Satisfaction Level 100%, 67%, etc. | [Available marks] - The selected mark is going to be counted as fully satisfied (100%), satisfied (67%), unsatisfied (33%), or extremely unsatisfied (0%). |